 Save to Pinterest
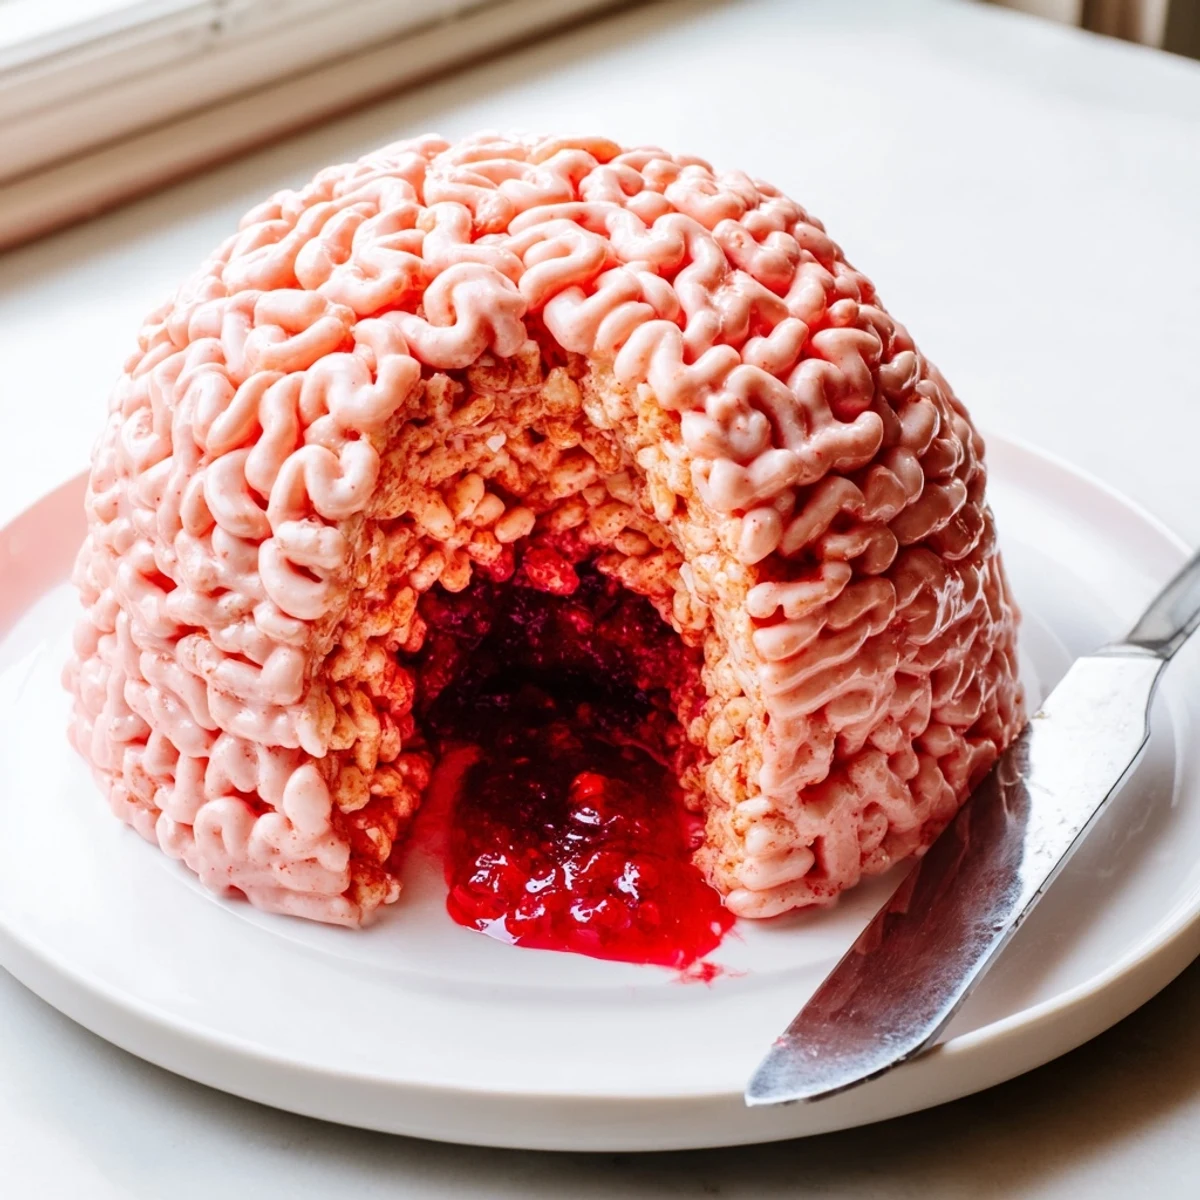
 This brain-shaped crispy rice treat brings the perfect amount of spooky fun to your Halloween gathering. The classic cereal and marshmallow combination gets a Halloween twist with pinkish-red coloring and a hidden cavity filled with raspberry or strawberry jam. When you slice into it, the red berry filling oozes out like something from a mad scientist's laboratory—though it tastes much better!
The process is similar to making traditional crispy rice treats, but you'll create a hollow center to hold the jam filling. Use a brain-shaped mold or line a bowl with plastic wrap to achieve the signature wrinkled brain appearance. The result is a festive dessert that looks impressively creepy but comes together in just 40 minutes with simple ingredients you likely have on hand.
Perfect for Halloween parties, school events, or as a fun weekend project with kids. The sweet, gooey center contrasts beautifully with the crispy exterior, making each bite an adventure. You can customize the decoration with additional food coloring for detailed brain ridges or add candy eyes for extra whimsy.
Last Halloween, my roommate accidentally walked in on me shaping what looked like a very anatomically correct pink brain in our kitchen. She stood frozen in the doorway until I held up a bag of marshmallows and said 'trick or treat?' Now it is the one treat our friends demand every October, mostly for the dramatic moment when we cut it open and the red filling oozes out.
I learned the hard way that using a real brain mold makes this unnervingly realistic. My nephew took one look at it and refused to touch anything on the Halloween table until I assured him it was just cereal and marshmallows. Now I keep some candy eyes nearby so it looks more fun than scary.
Ingredients
- 6 cups crispy rice cereal: The classic crispy texture that holds its shape surprisingly well
- 3 tablespoons unsalted butter: Prevents the marshmallow mixture from becoming overly sweet
- 1 (10 oz) bag mini marshmallows: Melts down faster and more evenly than large marshmallows
- Red or pink food coloring: Gel coloring gives you that realistic fleshy pink tone
- ½ cup raspberry or strawberry jam: Creates the blood-red oozing effect when sliced
- 2 tablespoons seedless raspberry or strawberry coulis: Makes the filling even more dramatic and runny
- Additional food coloring: For painting those creepy brain-like details on top
- Candy eyes or sprinkles: Optional but helps tone down the horror factor
Instructions
- Melt Your Base:
- Keep the heat at medium and stir constantly until every marshmallow has melted into a smooth, glossy pool.
- Color the Mixture:
- Add food coloring drop by drop until you reach that slightly unsettling flesh tone.
- Form the Brain Cavity:
- Butter your hands thoroughly and press half the mixture up the sides of your mold, leaving a hollow center for the surprise.
- Add the Scary Filling:
- Spoon the jam and coulis right into that hollow space, keeping it away from the edges.
- Seal It Up:
- Press the remaining cereal mixture over the top and pinch the edges together to lock the filling inside.
- Shape the Details:
- Use your fingers to create those characteristic brain folds and ridges while it is still pliable.
- Let It Set:
- Walk away for at least twenty minutes so everything firms up properly.
- Add the Final Touches:
- Paint on some darker red lines with food coloring for extra creepiness.
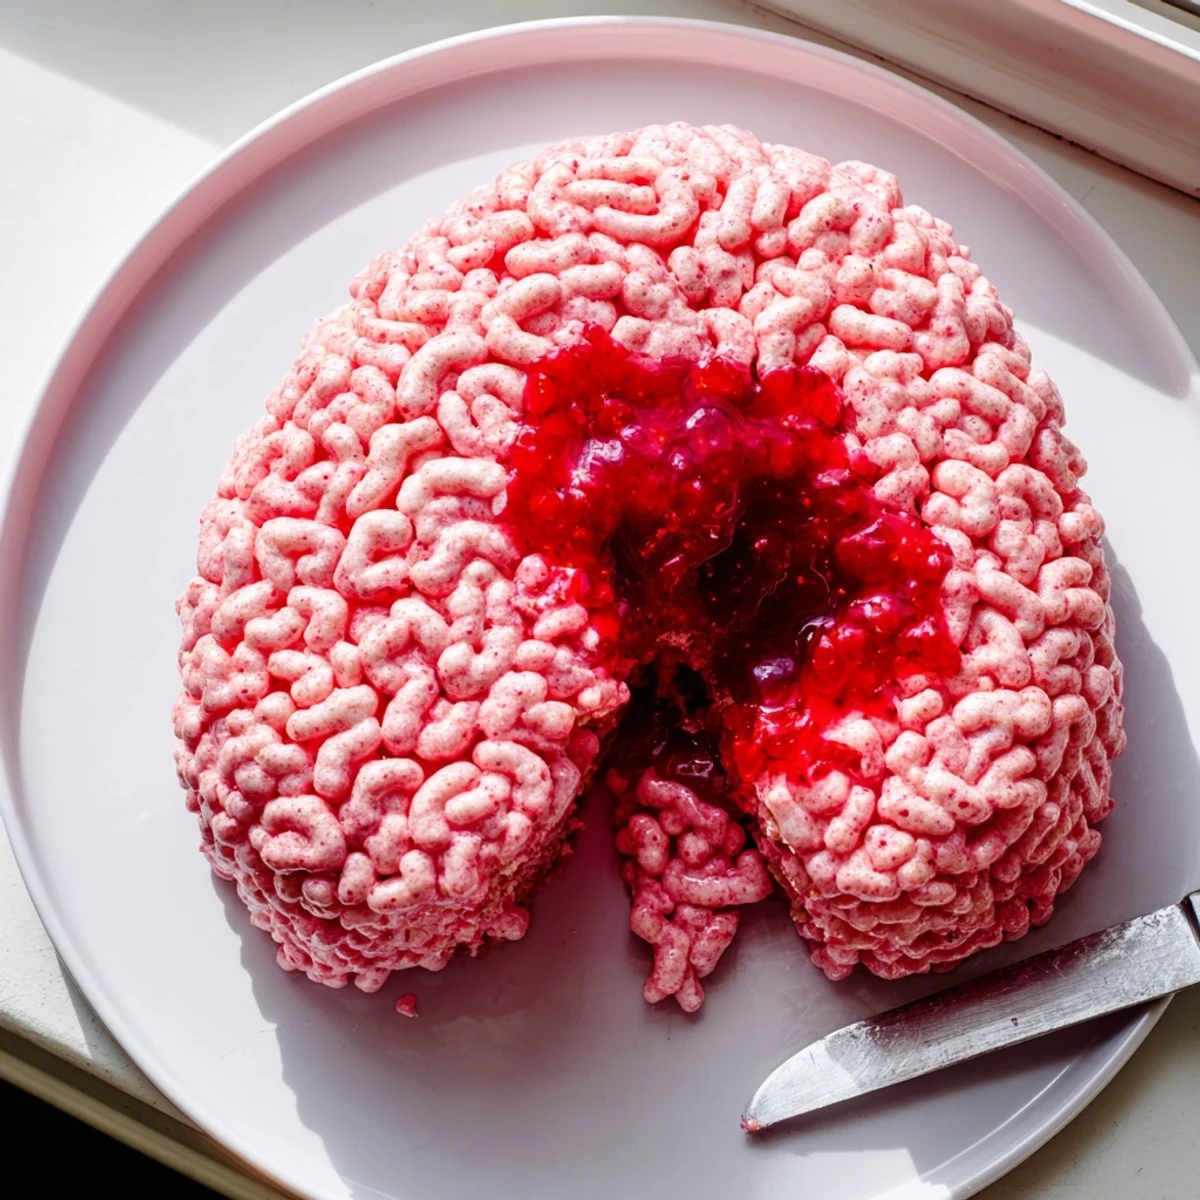
- The Big Reveal:
- Slice it open in front of your guests and watch their faces when the red filling starts oozing out.
 Save to Pinterest
 The year I brought this to a potluck, the host literally gasped when I set it on the table. Someone had to explain it was dessert before anyone would go near it. Now that same friend texts me every September asking if I am making it again.
Making It Spooky Without Being Too Gross
Balancing the creepy factor with something people actually want to eat takes some finesse. A few candy eyes strategically placed can transform something terrifying into something delightfully campy. I have found that lighter pink coloring reads more fun than deep, fleshy reds.
Getting That Perfect Ooze
The jam needs to be slightly warm to flow properly when you cut into the brain. Microwave it for ten seconds before filling, and make sure your cereal mixture is not completely cooled when you seal it inside.
Presentation Tricks
Set your finished brain on a platter decorated with fake cobwebs or surrounded by plastic spiders for maximum effect. A black serving tray makes the pink color pop dramatically.
- Serve it with a sharp knife for that authentic mad scientist vibe
- Dim the lights right before cutting to heighten the drama
- Keep a flashlight handy to spotlight the oozing filling
 Save to Pinterest
 This has become my absolute favorite Halloween party trick because it is equal parts impressive and ridiculous.
Recipe FAQs
- → How far ahead can I make the crispy rice brain?
-
You can make the brain up to 2 days in advance. Store it loosely covered at room temperature to maintain the crispy texture. If refrigerated, the cereal may become soft, so bring to room temperature before serving for the best texture.
- → Can I use different jam flavors?
-
Absolutely! While raspberry and strawberry provide the most realistic bloody effect, you can use cherry, blackberry, or even mixed berry preserves. Cherry will give the darkest, most dramatic color, while lighter berry jams create a subtler oozing effect.
- → Do I need a special brain-shaped mold?
-
No special equipment required! You can create the brain shape by lining a medium bowl with plastic wrap and pressing the cereal mixture along the sides. The natural folds and creases from the plastic wrap actually help create realistic brain-like texture. Brain-shaped molds are available at craft stores if you want more uniform results.
- → How do I get the brain texture details?
-
After unmolding, use a small clean paintbrush or toothpick dipped in red food coloring to paint additional ridges and squiggly lines that mimic brain folds. Alternatively, press the back of a spoon gently into the surface while the mixture is still slightly warm to create subtle indentations.
- → Can I make this gluten-free?
-
Yes! Simply use certified gluten-free crispy rice cereal (many mainstream brands contain malt syrup which isn't gluten-free). Check your marshmallows too—most are gluten-free, but always verify labels. The filling and decoration ingredients are naturally gluten-free.
- → Why is my mixture too sticky to work with?
-
If the cereal mixture is too sticky, let it cool for 2-3 minutes longer before shaping. You can also lightly butter your hands or spray them with non-stick cooking spray to prevent sticking. Working with slightly cooled mixture gives you better control and prevents the filling from melting too quickly.
