 Save to Pinterest
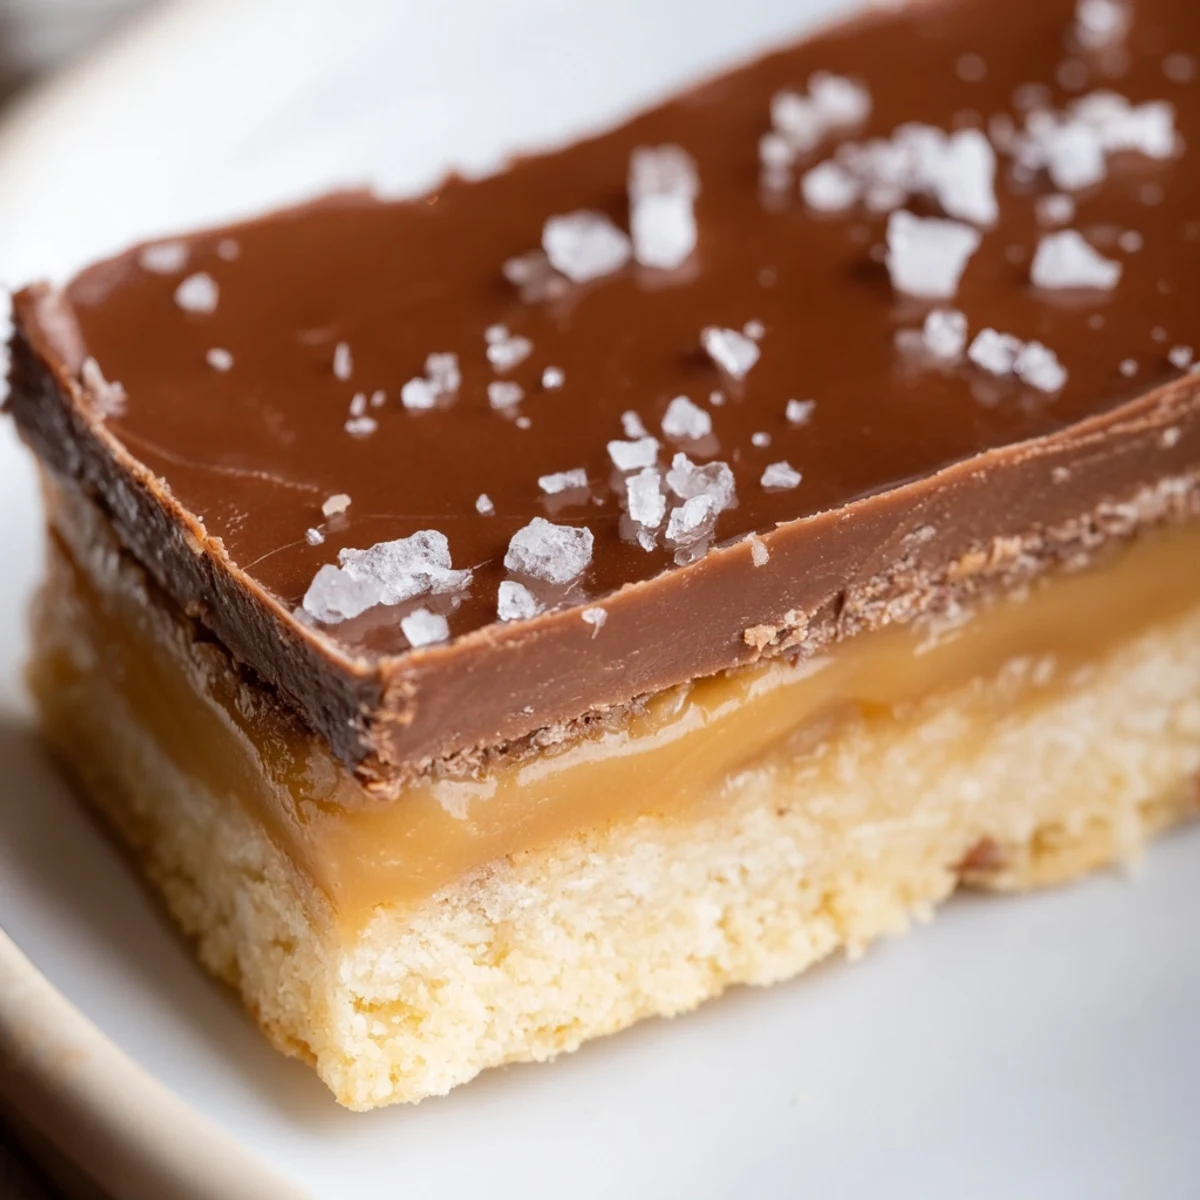
 These indulgent bars capture everything beloved about the iconic candy through homemade craftsmanship. The foundation starts with a buttery, tender shortbread crust baked until golden and crisp. A velvety caramel layer—crafted from butter, brown sugar, and sweetened condensed milk—cooks slowly until it reaches perfect consistency, then blankets the cooled base. Finally, a luscious milk chocolate ganache crowns each square, setting into a smooth finish that complements the buttery undertones beneath.
The process requires patience, particularly during the caramel stage where constant stirring ensures even cooking without scorching. Allowing proper cooling time between layers prevents mixing and maintains distinct, beautiful strata when cut. The result yields sixteen perfectly portioned bars, each offering the satisfying crunch-to-cream ratio that makes these confections utterly irresistible.
My college roommate Sophie introduced me to these bars during our study sessions, claiming they were better than the candy bar that inspired them. She was right, and Ive been making them for potlucks and late-night kitchen experiments ever since.
The first time I made these for my familys holiday gathering, my uncle grabbed six bars before dinner even started. Now theyre requested at every celebration, and I happily oblige because seeing peoples eyes light up at that first bite never gets old.
Ingredients
- 1 cup (225 g) unsalted butter, softened: This creates the tender shortbread foundation. Room temperature butter creams perfectly with sugar for that melt-in-your-mouth texture.
- 1/2 cup (100 g) granulated sugar: Sweetens the shortbread just enough without overpowering the caramel.
- 2 cups (250 g) all-purpose flour: Provides structure to the buttery base. Spoon and level your flour for accurate measurement.
- 1/4 tsp fine sea salt: Balances the sweetness and enhances all the flavors throughout.
- 1 cup (225 g) unsalted butter for caramel: Combined with brown sugar, this creates that luxurious caramel layer.
- 1 cup (200 g) packed light brown sugar: The molasses in brown sugar gives the caramel its deep flavor and gorgeous color.
- 4 tbsp (60 ml) light corn syrup or golden syrup: Prevents the caramel from crystallizing while it cooks.
- 2 cans sweetened condensed milk: The secret to impossibly smooth, creamy caramel that sets perfectly.
- 10 oz (285 g) milk chocolate: Milk chocolate stays true to the classic Twix flavor, but dark chocolate works beautifully too.
- 1 tbsp (15 g) unsalted butter for chocolate: Helps the chocolate melt smoothly and gives it a gorgeous sheen.
Instructions
- Preheat and prep your pan:
- Set your oven to 350°F (175°C) and line a 9x13-inch baking pan with parchment paper, letting the paper hang over the edges. This overhang becomes your handle for lifting the finished bars out later.
- Make the shortbread base:
- Cream the softened butter and sugar until light and fluffy, then mix in the flour and salt until a soft dough comes together. Press it evenly into your prepared pan and prick all over with a fork.
- Bake the shortbread:
- Bake for 18 to 20 minutes until the edges are lightly golden. Let it cool completely in the pan while you make the caramel.
- Cook the caramel layer:
- Melt the butter in a heavy saucepan over medium heat, then stir in the brown sugar, corn syrup, condensed milk, and salt. Bring to a gentle boil, stirring constantly, and cook for 7 to 10 minutes until thickened and golden, reaching 225°F on a candy thermometer if you have one.
- Add the caramel:
- Pour the hot caramel evenly over your cooled shortbread and spread with a spatula. Let it set at room temperature for about an hour until firm to the touch.
- Melt the chocolate:
- Combine the chocolate and butter in a heatproof bowl over simmering water or microwave in 20-second bursts, stirring until completely smooth and glossy.
- Top with chocolate:
- Pour the melted chocolate over the caramel layer and spread evenly. Let set at room temperature or refrigerate for 30 minutes until the chocolate is firm but not rock-hard.
- Slice and serve:
- Use the parchment overhang to lift the entire block from the pan, then cut into 16 bars with a sharp knife. Wipe the blade between cuts for those clean, professional-looking edges.
 Save to Pinterest
 Last Christmas, I wrapped these in individual wax paper wrappers and tucked them into gift boxes. My friends said opening each one felt like unwrapping a present within a present. Sometimes the simplest packaging makes the biggest impact.
Temperature Control Matters
That candy thermometer isn't just for show. Getting the caramel to exactly 225°F creates that perfect chewy consistency. Too cool and itll be gooey and messy, too hot and youll end up with a hard layer that pulls away from the shortbread.
Chocolate Wisdom
I learned the hard way that pouring hot chocolate onto room-temperature caramel creates a marbled effect instead of a smooth layer. Let your melted chocolate cool for just a couple of minutes before pouring, and youll get that gorgeous, professional finish.
Storage Secrets
These bars actually taste better on day two, when all the layers have had time to become friends. Store them in an airtight container at room temperature for up to five days, though they rarely last that long in my house.
- Layer bars between parchment paper to prevent sticking
- Avoid the refrigerator unless your kitchen is very warm
- Bring chilled bars to room temperature before serving for the best texture
 Save to Pinterest
 Theres something deeply satisfying about making a candy-inspired treat from scratch. These bars remind me that the best desserts are worth every minute of effort.
Recipe FAQs
- → How long do these bars need to set before serving?
-
Allow approximately 2 hours total—the shortbread needs to cool completely before adding caramel, the caramel requires 1 hour to firm at room temperature, and the chocolate benefits from 30 minutes in the refrigerator. This gradual setting ensures clean, distinct layers when sliced.
- → Can I make these bars ahead of time?
-
Absolutely. These bars actually improve after a day as the flavors meld together. Store in an airtight container at room temperature for up to 5 days. Layer parchment paper between stacked bars to prevent the chocolate from sticking to the caramel of adjacent pieces.
- → What's the best way to achieve clean cuts?
-
Use a sharp knife warmed under hot water and dried between cuts. Score the chocolate lightly first to mark your lines, then press firmly through all three layers. Wipe the blade clean after each cut for pristine edges. Alternatively, let the bars sit at room temperature for 10 minutes after refrigeration before cutting.
- → Can I substitute dark chocolate for the milk chocolate topping?
-
Yes, dark chocolate creates a sophisticated contrast against the sweet caramel. The slight bitterness balances the rich, sugary middle layer beautifully. Keep the same quantity and follow the same melting instructions with 1 tablespoon of butter for optimal spreadability.
- → Why is my caramel grainy or separated?
-
Graininess typically occurs when sugar crystals form during cooking. Stir constantly and brush down any crystals on the sides of the pan with a wet pastry brush. Separation happens from excessive heat—keep the temperature at a gentle simmer and avoid exceeding 225°F. Using a candy thermometer ensures precision.
- → Can I freeze these bars for longer storage?
-
Freezing works beautifully. Wrap individual bars tightly in plastic wrap, then place in a freezer-safe container for up to 3 months. Thaw overnight in the refrigerator, then bring to room temperature for 30 minutes before serving. The texture remains remarkably close to freshly made.
