 Save to Pinterest
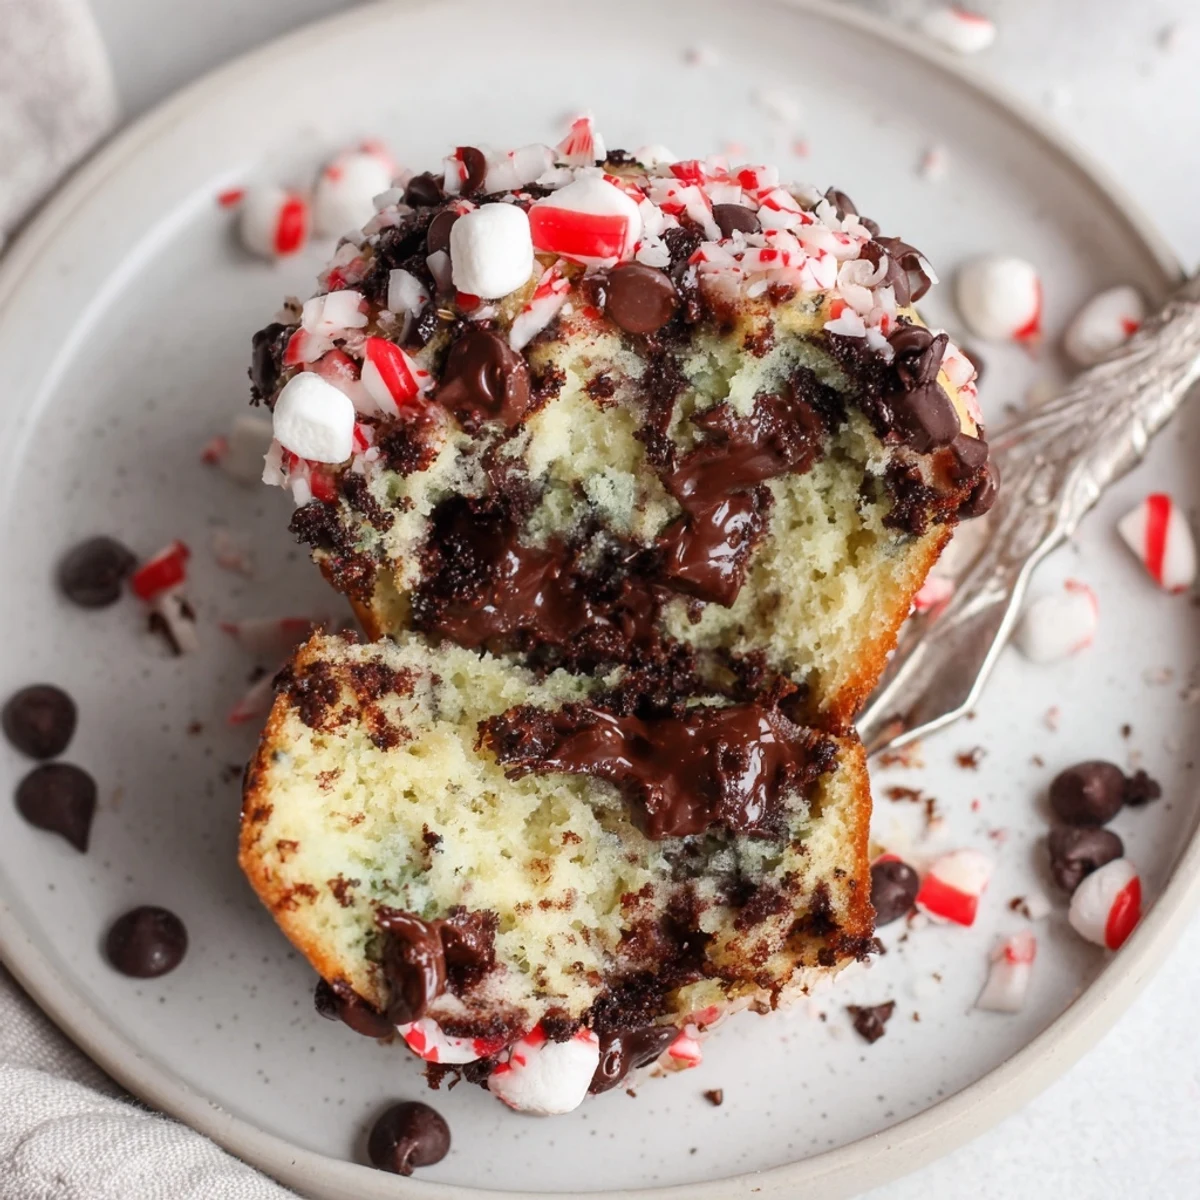
 Yield 12 muffins in about 40 minutes. Whisk together the dry ingredients, combine eggs, milk, oil and peppermint, then fold wet into dry until just mixed. Stir in chocolate chips, marshmallows and crushed peppermint, fill liners 3/4 full and bake 18–20 minutes. Cool briefly, garnish with extra chips or candy and store airtight up to 3 days.
The moment I opened a bag of crushed peppermint candies in my kitchen, a crisp wintry scent seemed to tangle instantly with the deep aroma of cocoa dust in the air. There’s something cheerful about peppermint and chocolate together—like the fizz of the first snow on a December morning. Baking these muffins, I caught myself humming quietly, drawn in by the sound of chocolate chips dropping one by one into the bowl. I was surprised how this simple bake filled my kitchen with the spirit of a mug of peppermint hot chocolate—steamy, sweet and bright.
I once brought a batch of these muffins fresh from the oven to an impromptu movie night with neighbors. The laughter almost stopped when the tray arrived—suddenly everyone was reaching for the muffins, marveling at each melty chocolate bit and the shimmer of peppermint topping. Even people who claimed they weren’t dessert people conceded defeat after just one bite. Watching that moment of delight was more satisfying than any perfectly frosted cake I could have offered.
Ingredients
- All-purpose flour: Gives the muffins structure, and I’ve learned to spoon and level it to avoid dense results.
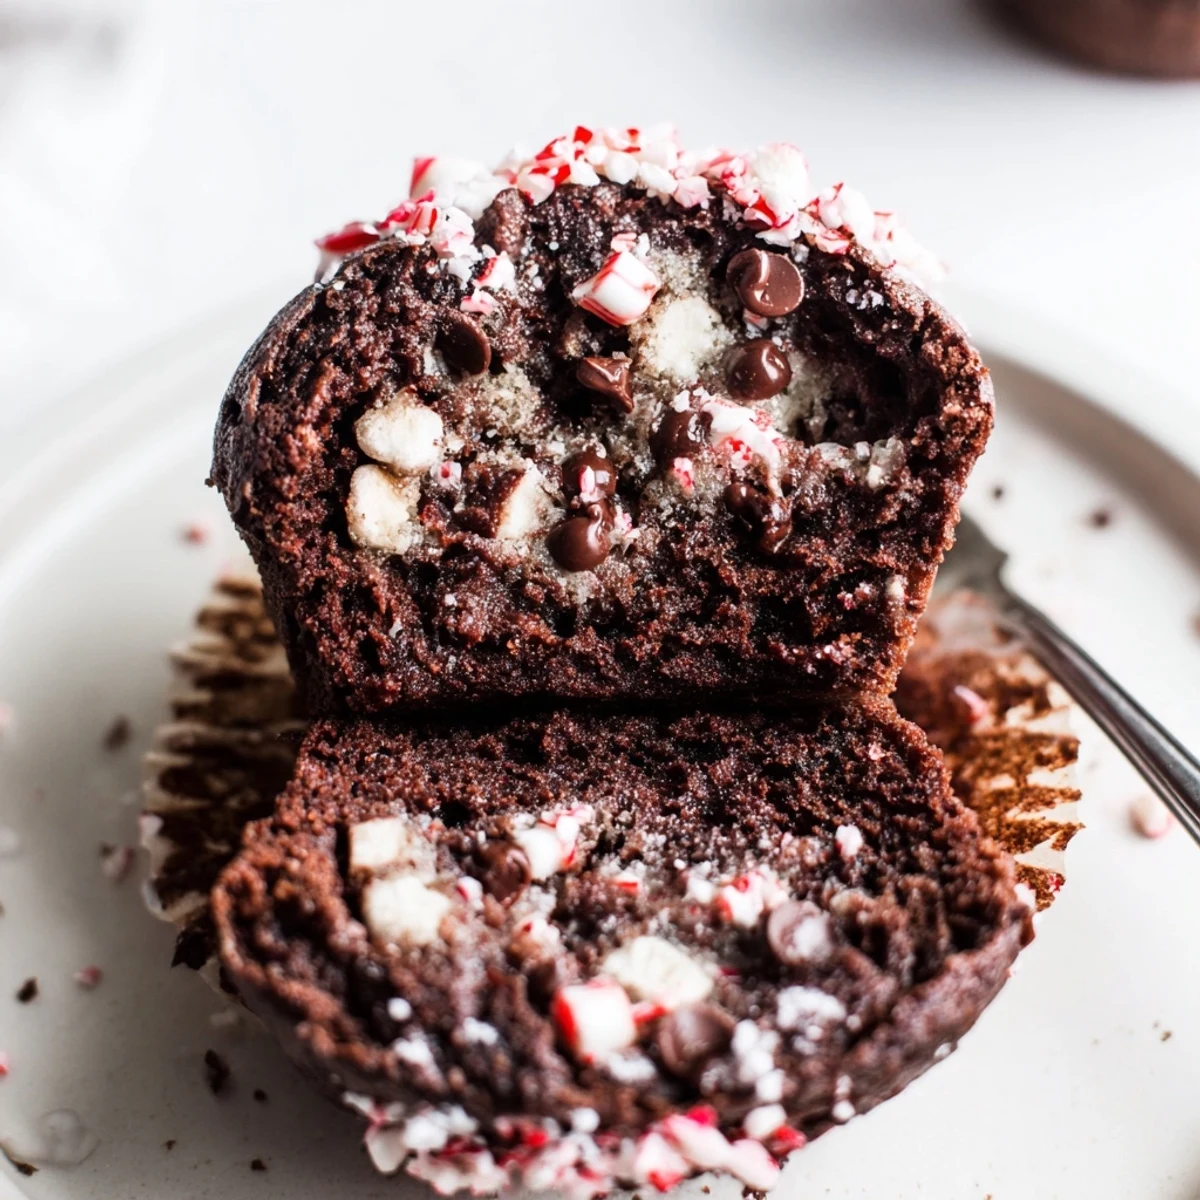
- Unsweetened cocoa powder: Use the best you have—good cocoa is what makes these muffins taste like actual hot chocolate.
- Granulated sugar: Sweetens and helps the tops form those subtle crackly crowns.
- Baking powder and baking soda: The duo ensures a proper rise so you get fluffy instead of flat muffins.
- Salt: A pinch amplifies the chocolate, even though it seems like such a small thing.
- Eggs: Room temperature eggs blend effortlessly for a tender crumb—run them under warm water if needed.
- Whole milk: Adds moisture for that soft, rich texture; don’t substitute with water or the muffins lose their plushness.
- Vegetable oil: Keeps these extra moist, and I’ve found oil works better than butter here.
- Peppermint extract: Just a teaspoon transforms the whole batch; too much and the flavor overwhelms.
- Vanilla extract: Softens and balances the cool mint with comforting warmth.
- Semi-sweet chocolate chips: Scatter in bursts of chocolate—the more the merrier, but don’t skip the semi-sweet variety.
- Mini marshmallows (optional): These melt into sticky pockets that remind me of marshmallows slowly dissolving in cocoa—absolutely worth adding.
- Crushed peppermint candies: For color, crunch, and a sparkling finish that makes every bite interesting.
- Extra chocolate chips, marshmallows, and peppermint candies: Go generous on the garnish for bakery-style appeal; it’s what coaxes out the oohs and aahs.
Instructions
- Prepare the pans:
- Line your muffin tin before anything else so nothing sticks and clean up is a breeze.
- Mix the dry ingredients:
- Whisk flour, cocoa, sugar, baking powder, baking soda and salt together; notice how the cocoa darkens, giving the mix a wintry charm.
- Combine the wet ingredients:
- In a separate bowl, blend eggs, milk, oil, peppermint and vanilla—take a second to enjoy the minty aroma as it rises up.
- Bring it all together:
- Pour wet over dry and use a spatula to gently fold—aim for streaks of flour just disappearing but stop before it’s smooth.
- Add the fun stuff:
- Fold in chocolate chips, marshmallows, and peppermint pieces, letting the batter become thick and speckled.
- Fill the tin:
- Spoon batter into the lined cups, generously filling them about 3/4 full for big, domed tops.
- Add the toppings:
- Scatter more chocolate, peppermint and marshmallows on top, letting the colors pop against the dark batter.
- Bake to perfection:
- Slide the tin into the oven—after about 18 minutes, check with a toothpick; you’re looking for a few moist crumbs, never dryness.
- Cool and enjoy:
- Let them rest in the pan for five minutes so the edges set, then gently move to a rack and wait as long as you can before digging in.
 Save to Pinterest
 There was one afternoon when I shared these with a friend who never liked ‘peppermint anything’—until now. She leaned in, grinning, with chocolate smudged at the corner of her mouth, and confessed that she could eat these all week. It was a small, happy victory. Sometimes, a fresh baked treat is all it takes to change a mind.
How to Store Your Muffins So They Stay Fresh
I found these muffins were just as delightful on day two, but only if kept in an airtight container at room temperature. The flavors settle and deepen, the peppermint softening a little while the chocolate stays gooey. Avoid the fridge or they’ll dry out—trust me, it’s never as good. If you want that melty just-baked quality, a quick 10-second zap in the microwave works wonders.
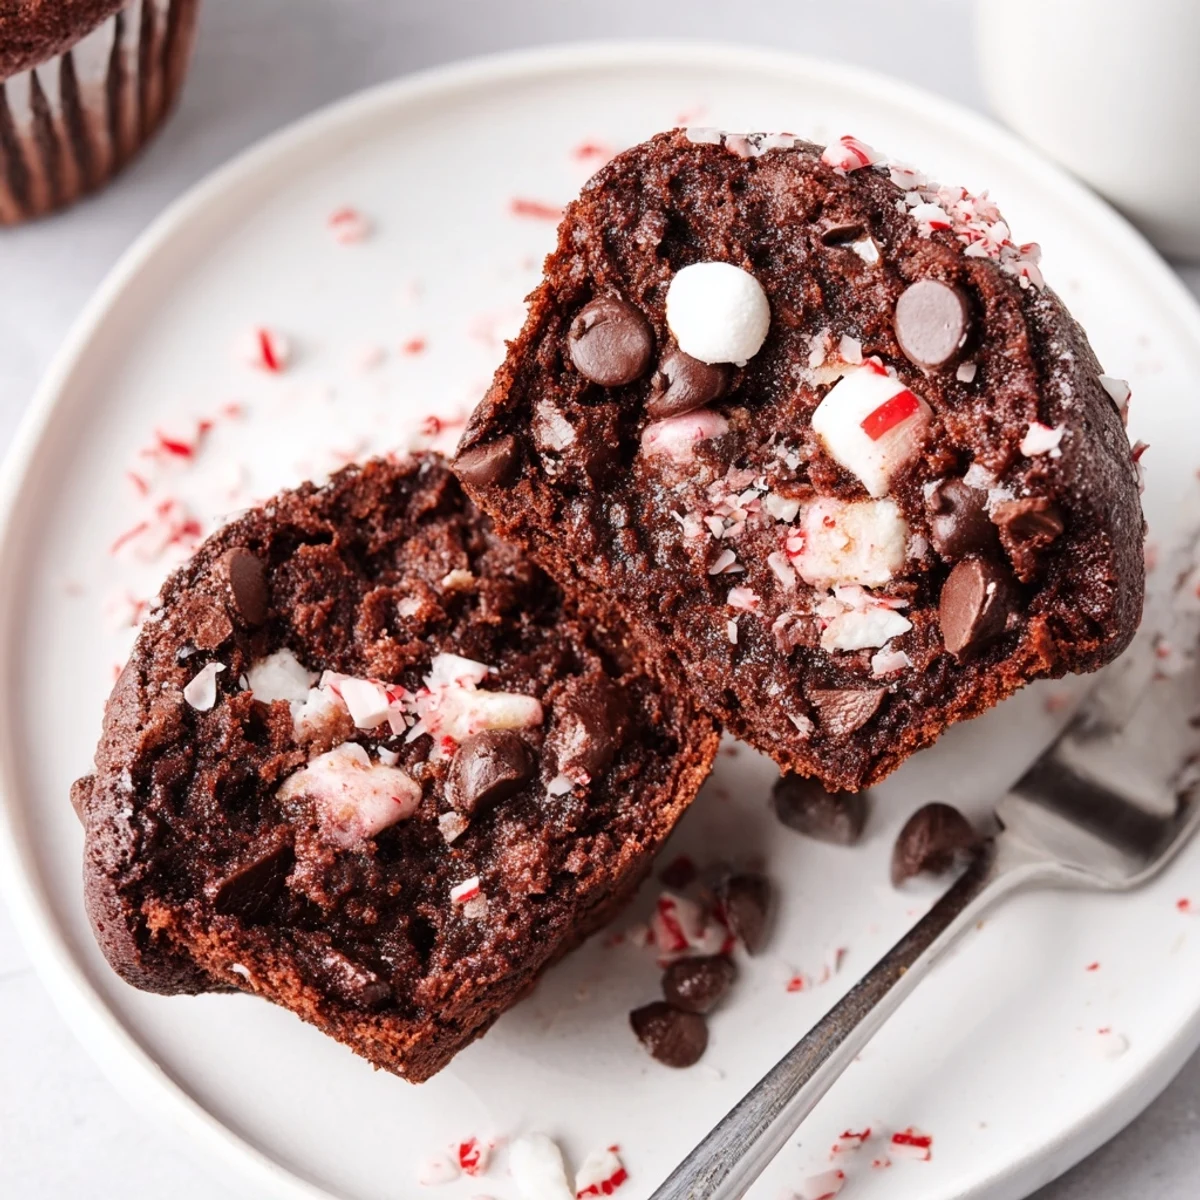
Bringing Peppermint & Chocolate Into Everyday Life
This muffin recipe convinced me that a holiday flavor belongs year round. Once I even swapped the marshmallows for white chocolate chips, just to see how it played out—spoiler: completely delicious and perfect for spring brunches. There’s a simple magic in tasting something familiar with a surprising new tweak. It’s worth experimenting to find your own best combination.
Troubleshooting for Perfect Muffins
Once, distracted by a phone call, I left the muffins in a full two minutes too long and they came out a bit dry—lesson learned. If your muffins turn out sunken, check that your baking powder and soda haven’t expired, since leaveners really do lose their punch over time. And for a bakery-style dome, let the filled muffin tin sit on the counter for five minutes before baking—somehow, it works every time.
- Add crushed peppermint only once batter is mixed, to prevent dissolving.
- Resist overloading with marshmallows or they’ll overflow.
- Allow muffins to cool before unwrapping to keep tops intact.
 Save to Pinterest
 There’s a spark of joy in sharing a plate of these muffins, whether it’s a slow morning or a festive evening. I hope your kitchen fills with that same sweet, minty magic.
Recipe FAQs
- → Can I use dark chocolate chips instead of semi-sweet?
-
Yes. Dark chocolate will give a richer, slightly less sweet profile; use the same amount and taste the batter for balance before baking.
- → How do I prevent add-ins from sinking to the bottom?
-
Toss chips and crushed candy in a tablespoon of flour before folding into the batter and fold gently to distribute without overmixing.
- → What if I don’t have peppermint extract?
-
You can omit it or replace with a small amount of finely grated fresh mint leaves for a subtler herbal note; if using oil, use far less as it’s concentrated.
- → How can I tell when the muffins are fully baked?
-
Insert a toothpick into the center; it should come out mostly clean with a few moist crumbs. Tops should spring back slightly when touched.
- → What’s the best way to store leftovers?
-
Cool completely, then keep in an airtight container at room temperature for up to 3 days. For longer storage, freeze cooled muffins in a sealed bag for up to 2 months.
- → Can I prepare the batter ahead of time?
-
Prepare the batter and refrigerate for up to 24 hours, covered. Bring to room temperature briefly and stir gently before portioning and baking to ensure even rise.
