 Save to Pinterest
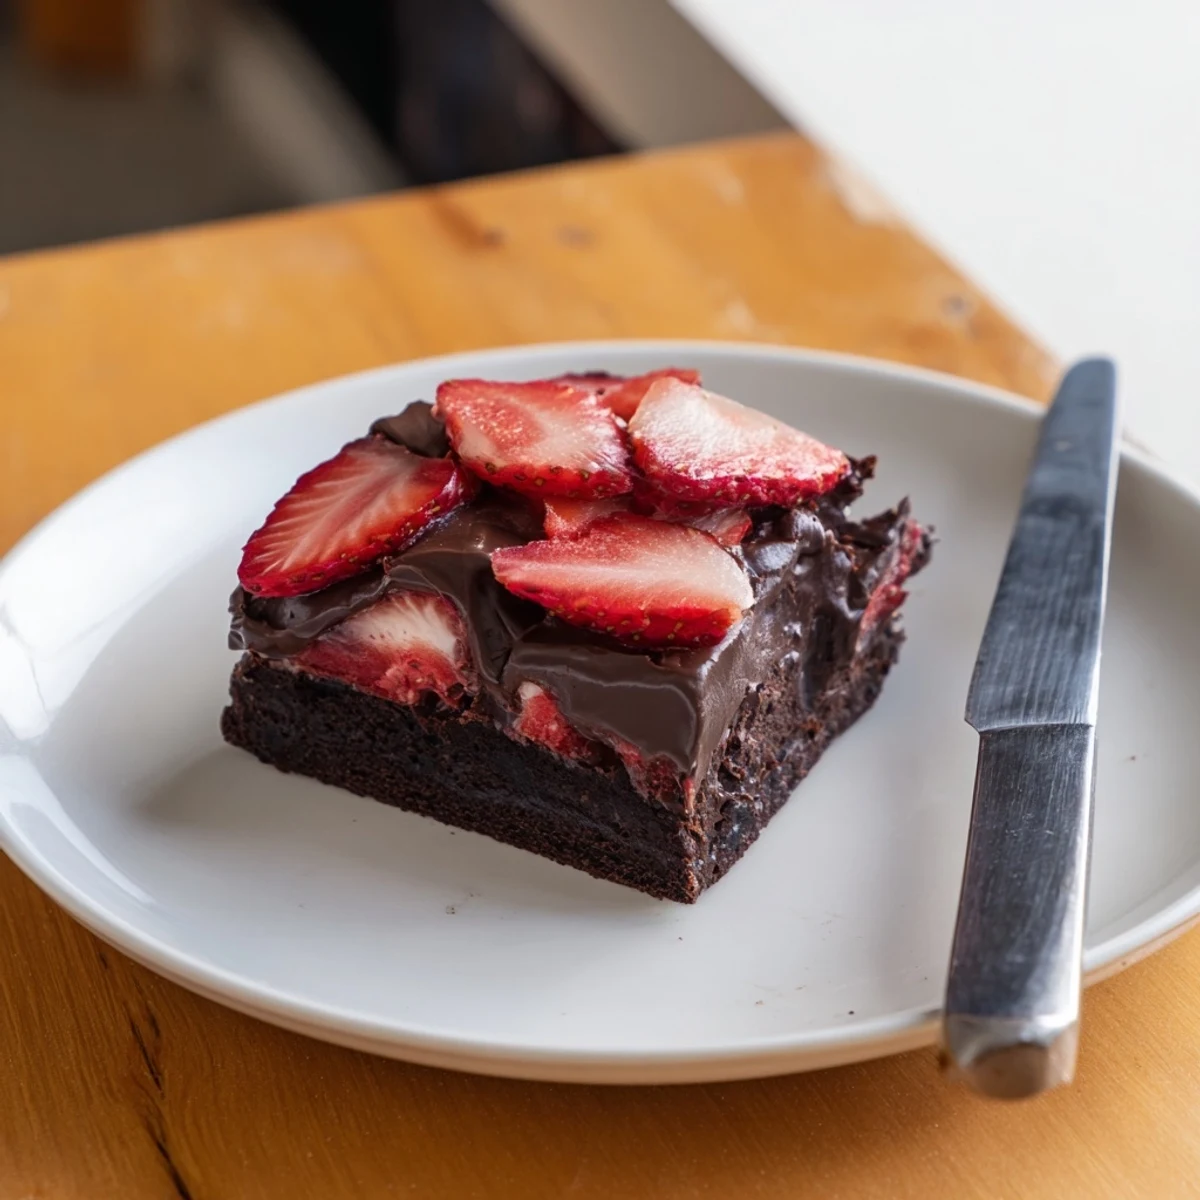
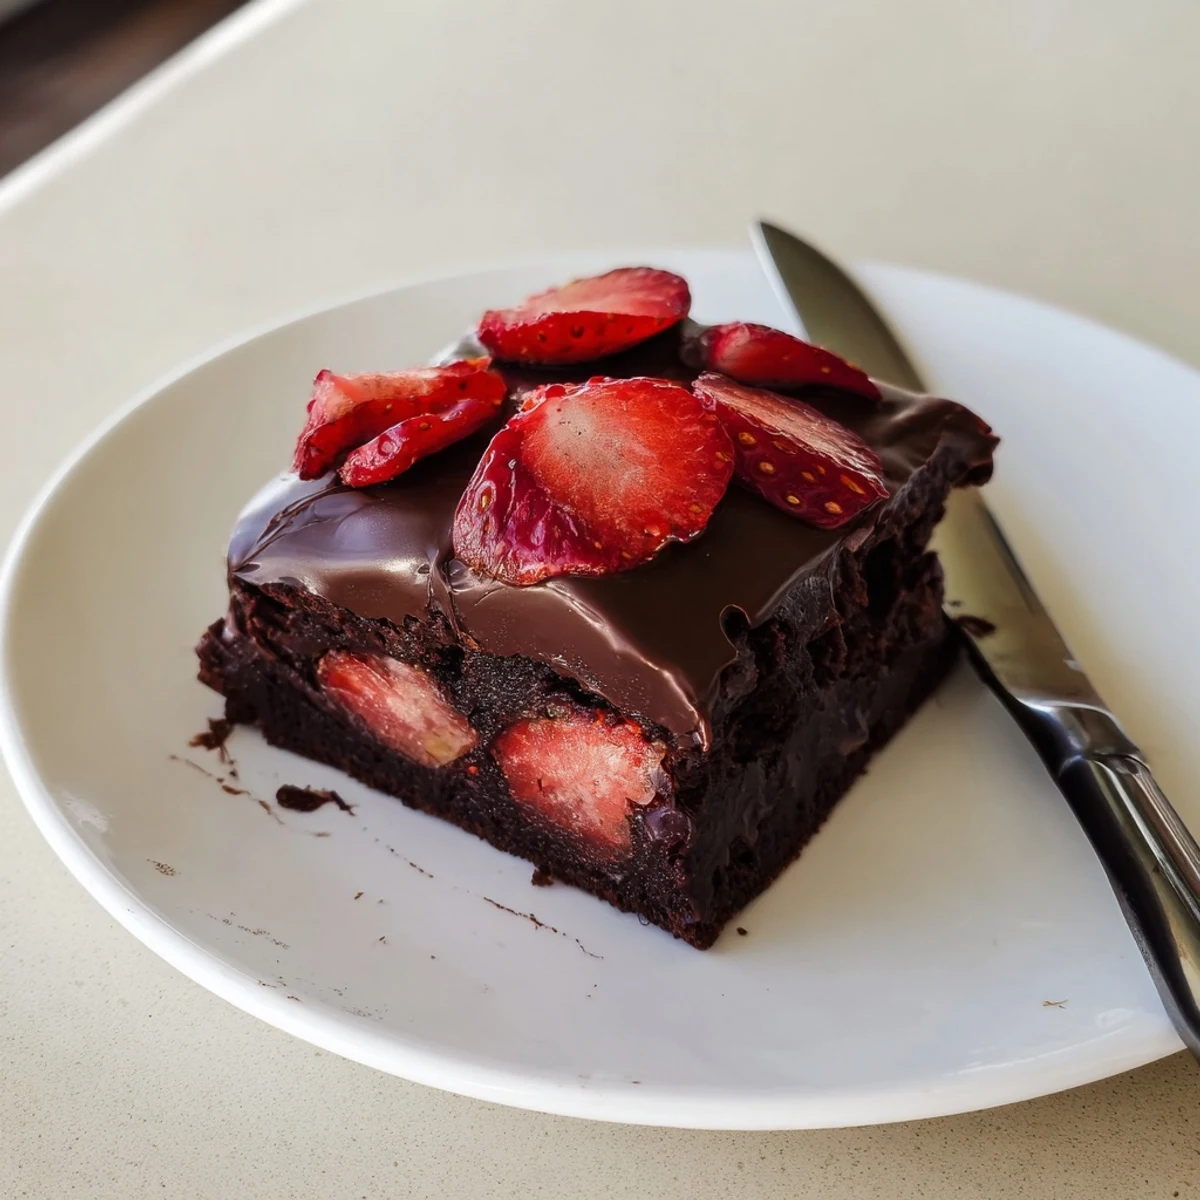
 These chocolate covered strawberry brownies bring together a dense, fudgy brownie base with a layer of juicy fresh strawberries, all sealed beneath a smooth, glossy chocolate coating. The contrast of textures—from the chewy brownie to the burst of fresh fruit—makes every bite unforgettable.
They require no special equipment beyond a basic baking pan and microwave. After baking the brownie base, you simply arrange sliced strawberries on top and pour over the melted chocolate. A quick chill in the fridge sets everything perfectly.
Great for celebrations, potlucks, or an indulgent weekend baking project, they store well in the fridge for up to three days.
The radiator in my first apartment used to click and groan every February, and somehow that sound became tangled up with the smell of melting chocolate and butter. I started making brownies as a defense against the cold, and one evening I had leftover strawberries sitting on the counter that needed using up. That serendipitous fridge raid produced something I still crave the moment temperatures drop below freezing.
I brought a tray of these to a potluck once and watched a friend try to cut one with a plastic fork, failed, and simply picked up the whole thing with her hands instead. She ate it standing by the door with strawberry juice running down her wrist and declared it the best decision shed made all week. That is the energy this dessert brings out in people.
Ingredients
- 115 g (1/2 cup) unsalted butter: The foundation of a chewy brownie, so use good quality butter here because you will taste the difference.
- 180 g (1 cup) semisweet chocolate chips (for the brownie): Melting these with butter creates an intensely rich base that cocoa powder alone cannot replicate.
- 150 g (3/4 cup) granulated sugar: Balances the bitterness of the chocolate and contributes to that crackly top crust everyone fights over.
- 55 g (1/4 cup) packed brown sugar: Adds moisture and a subtle caramel depth that makes the interior wonderfully fudgy.
- 2 large eggs: Room temperature eggs blend more smoothly and help create that dense yet tender crumb.
- 1 tsp pure vanilla extract: A quiet background note that rounds out all the chocolate intensity.
- 90 g (3/4 cup) all-purpose flour: Measure by spooning into the cup and leveling off, because too much flour turns brownies cakey and sad.
- 1/4 tsp salt: Just enough to make the chocolate taste more like itself.
- 300 g (about 2 cups) fresh strawberries, hulled and sliced: Pat them completely dry after slicing, because excess moisture is the enemy of the chocolate coating.
- 180 g (1 cup) semisweet chocolate chips (for the coating): Combined with oil, this melts into a glossy shell that snaps when you bite into it.
- 1 tbsp coconut oil or neutral vegetable oil: This is the trick that turns ordinary melted chocolate into something smooth, shiny, and firm enough to slice cleanly.
Instructions
- Prep your pan and oven:
- Heat the oven to 175 degrees C (350 degrees F) and line a 22x22 cm baking pan with parchment, letting the paper hang over the edges like handles. This little trick saves you from the dreaded brownie stuck to the pan situation.
- Melt the chocolate and butter:
- Combine the butter and 180 g of chocolate chips in a microwave safe bowl and heat in 30 second bursts, stirring between each round, until the mixture is silky smooth with no lumps remaining.
- Build the batter:
- Pour in both sugars and whisk until everything is blended and glossy, then add the eggs one at a time, beating well after each before stirring in the vanilla. Fold in the flour and salt gently and stop the moment you no longer see dry streaks.
- Bake until just right:
- Spread the batter evenly in your prepared pan and bake for 25 to 30 minutes, pulling them out when a toothpick comes out with moist crumbs clinging to it. Let the brownies cool completely in the pan because patience here prevents a strawberry topped mess later.
- Layer on the strawberries:
- Arrange the sliced strawberries in a single even layer across the surface of the cooled brownies, nestling them close together so every square gets a generous amount of fruit.
- Create the chocolate shell:
- Melt the remaining chocolate chips with the oil in 30 second intervals, stirring until the mixture is glossy and pourable, then spread it evenly over the strawberries while gently tilting the pan to encourage the coating into every corner.
- Chill and slice:
- Refrigerate for at least 30 minutes until the top is firm to the touch, then use the parchment overhang to lift the whole slab out and cut it into 12 squares with a sharp knife.
 Save to Pinterest
 There was a Saturday afternoon when my neighbor knocked on my door to return a borrowed casserole dish and I handed her one of these still chilled from the fridge. She stood in the hallway eating it, said nothing for a full minute, and then asked if I would make them for her daughters birthday. Food becomes a language of its own when the right person takes a bite.
Storage That Actually Works
Keep these in an airtight container in the refrigerator and they stay delicious for up to three days, though in my experience they rarely last that long. The chocolate shell holds up well when chilled, and I actually prefer the texture straight from the fridge because the contrast between cold snap and soft interior is sensational.
Variations Worth Trying
Swap the semisweet coating for dark chocolate if you want something less sweet and more intensely flavored, which pairs beautifully with the natural sweetness of ripe strawberries. A drizzle of melted white chocolate over the set coating adds a festive look that turns these into a holiday worthy dessert with almost no extra effort.
Getting A Clean Slice
The secret to bakery neat squares is a hot knife, so run your blade under warm water, dry it quickly, and press straight down without sawing back and forth.
- Wipe the knife clean between every single cut for the tidiest results.
- Chill the brownies for the full 30 minutes before attempting to slice them.
- Remember that rustic looking cuts still taste incredible, so do not stress over perfection.
 Save to Pinterest
 Some desserts are just dessert, and then some become the thing you bring to every gathering, the recipe people text you about at odd hours. These brownies have earned that spot in my kitchen, and I suspect they will in yours too.
Recipe FAQs
- → Can I use frozen strawberries instead of fresh?
-
Fresh strawberries work best because frozen ones release excess moisture as they thaw, which can make the brownie base soggy and prevent the chocolate coating from setting properly. If frozen is your only option, thaw and thoroughly pat them dry with paper towels before arranging on the brownies.
- → How do I get clean slices when cutting these brownies?
-
Make sure the brownies are fully chilled before slicing—at least 30 minutes in the refrigerator. Use a sharp knife dipped in hot water and wiped dry between each cut. The cold chocolate coating will stay firm and produce neat, professional-looking squares.
- → What type of chocolate works best for the coating?
-
Semisweet chocolate chips are the standard choice, but dark chocolate (60–70% cacao) adds a sophisticated bitterness that balances the sweetness beautifully. The small amount of coconut oil or neutral oil thins the chocolate slightly, giving you that smooth, snappable coating once chilled.
- → Can I make these brownies ahead of time?
-
Yes, they actually improve after a night in the fridge as the flavors meld together. Store them in an airtight container with parchment between layers to prevent sticking. They'll keep well for up to three days refrigerated. Bring them out about 10 minutes before serving for the best texture.
- → How can I tell when the brownie base is properly baked?
-
Insert a toothpick into the center around the 25-minute mark. It should come out with moist crumbs clinging to it, not wet batter. The edges will look set and slightly pulled away from the pan. Remember, the brownies continue cooking slightly as they cool in the pan, so slight underbaking is preferable to overbaking.
- → Is it possible to make these gluten-free?
-
Absolutely. Substitute the all-purpose flour with a 1:1 gluten-free baking flour blend that contains xanthan gum. Also double-check that your chocolate chips are certified gluten-free, as some brands may have cross-contamination. The texture will be nearly identical to the original version.
