 Save to Pinterest
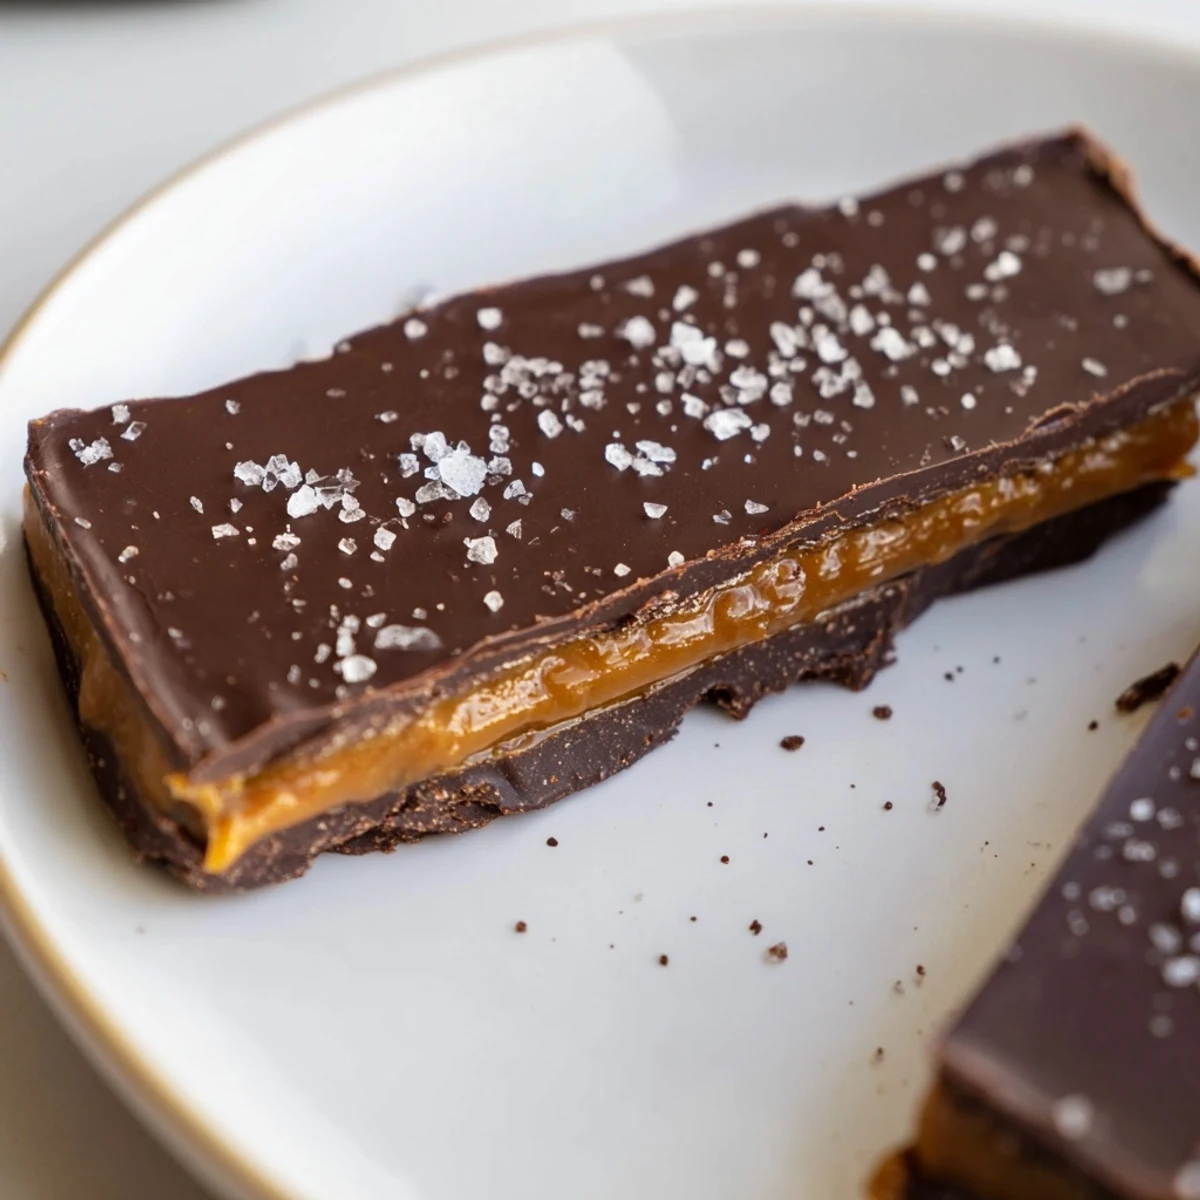
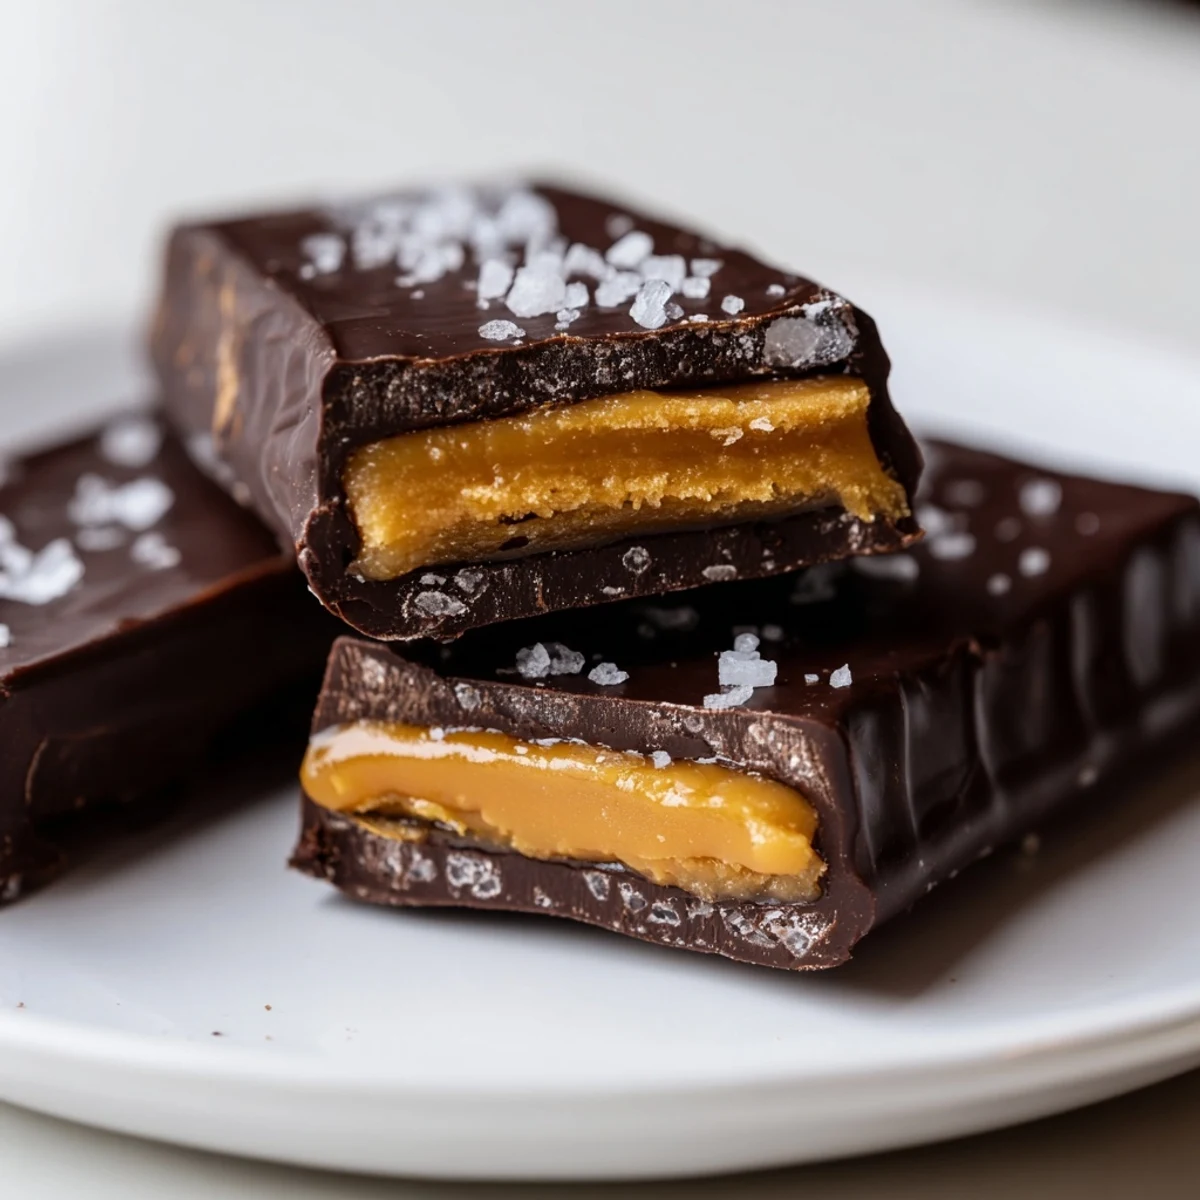
 These bars showcase a rich combination of semi-sweet chocolate and creamy caramel, enhanced with a subtle sea salt touch. The chocolate base and topping are melted smoothly and chilled for a firm finish, while the caramel layer is crafted by slow cooking sugar, butter, and cream until golden and luscious. Sprinkled with flaky sea salt, each bar balances sweet and salty flavors. Ideal for chocolate lovers, these bars offer a satisfying texture and indulgent taste, perfect for homemade treats or sharing.
There's something almost meditative about watching chocolate melt into glossy ribbons, and that's exactly what drew me to these bars on a quiet Sunday afternoon when a friend mentioned she'd been craving homemade caramel. I didn't have much of a plan beyond that conversation, but I found myself pulling out butter, cream, and chocolate—and somehow three perfect layers came together. What started as a casual kitchen experiment turned into the kind of treat I now make whenever I want to feel like I've accomplished something delicious.
My sister bit into one of these cold from the fridge and just closed her eyes for a moment, which told me everything. She's not someone who gets excited about desserts easily, but something about the contrast between the snap of cold chocolate and the slight give of caramel made her ask for the recipe before she'd even finished the first bar. Now whenever she visits, these are what she requests.
Ingredients
- Semi-sweet or dark chocolate (300 g, chopped): The backbone of these bars—semi-sweet gives you that familiar sweetness while dark chocolate brings sophistication and depth.
- Unsalted butter (2 tbsp, plus 90 g more cubed): Keep it unsalted so you're in control of the salt story, and cube that caramel butter so it melts evenly into the sugar without clumping.
- Granulated sugar (200 g): This is where patience matters most—you're looking for deep golden, not brown, or you'll taste bitter instead of sweet.
- Heavy cream (120 ml): Room temperature or slightly warm is your friend here; cold cream hitting hot caramel can cause angry sputtering.
- Fine sea salt (1/2 tsp): Add it to the caramel itself, then a pinch of flaky sea salt on top for contrast and a reminder that salt is chocolate's best friend.
- Vanilla extract (1 tsp): This quietly rounds out the caramel and makes it taste less like candy and more like something special.
- Flaky sea salt (optional): If you use it, let just a few crystals sit on top—restraint is key.
Instructions
- Prep your pan like you mean it:
- Line a 20 × 20 cm pan with parchment, leaving overhang on all sides so you can lift the whole thing out later without wrestling.
- Make the first chocolate foundation:
- Melt 180 g chocolate with 1 tbsp butter slowly over simmering water, stirring constantly until it's glossy and smooth—no lumps, no rushing. Pour it into your pan and spread it evenly right to the edges, then slide it into the fridge for 20 minutes.
- Coax the sugar into caramel:
- In a medium saucepan over medium heat, watch the sugar closely as it melts—don't stir constantly, just a gentle occasional stir keeps it moving toward that golden-brown moment around 5-7 minutes. You'll know it's right when it smells toasty and looks like amber.
- Build your caramel:
- Drop in your cubed butter and stir until it disappears into the sugar, then pour the cream in slowly while stirring because yes, it will bubble and sputter and that's exactly what should happen. Add salt and vanilla, let it bubble gently for 2-3 minutes, then pull it off heat.
- Layer with calm:
- Let the caramel cool for 10 minutes so it doesn't melt your chocolate base, then pour it over the chilled chocolate and refrigerate for 30 minutes.
- Seal it all in:
- Melt your remaining 120 g chocolate with 1 tbsp butter the same way you did the first time, pour it over the set caramel, and spread it smooth right to the edges.
- The final touch:
- If you're using flaky sea salt, sprinkle it now while the chocolate is still slightly warm so it sticks. Then chill for at least 30 minutes until everything is firm enough to cut cleanly.
- Cut and celebrate:
- Use the parchment to lift the whole block out, place it on a cutting board, and use a sharp warm knife (wipe it warm between cuts) to get clean bars.
 Save to Pinterest
 I learned the hard way that using a warm knife changes everything about the final presentation—I used a cold blade once and ended up with gorgeous but jagged bars. Now I warm my knife under hot water, dry it, and cut through like I'm slicing warm butter, which gives me those clean lines that make people think I know what I'm doing in the kitchen.
The Caramel Moment
Caramel is forgiving until it suddenly isn't, which is why I keep my heat at medium and my attention even. The smell changes first—it goes from sweet sugar smell to something deeper and almost toasty—and that's your cue to look closely at the color. If you're nervous the first time, that nervousness is actually perfect; caramel made with respect tastes better than caramel made in a rush.
Chocolate Temper and Texture
You don't need to temper chocolate for these bars, but you do need to melt it slowly and carefully so it stays smooth and glossy instead of turning grainy or dull. A double boiler is gentler than a microwave, but if you're microwaving, use 30-second bursts and stir between each one—your chocolate will thank you by setting with that satisfying snap when you bite into it.
Variations and Customization
These bars are delicious as written, but they also whisper suggestions as soon as you understand the base recipe. Try adding chopped toasted nuts, crushed shortbread, or even a layer of espresso powder mixed into the caramel for grown-up versions. Switch your chocolate ratio or type based on your mood—dark for intensity, milk for sweetness, or even white chocolate on top if you're feeling adventurous.
- Toasted nuts like almonds or hazelnuts add crunch and make these feel like a fancy gift.
- A pinch of espresso powder in the caramel brings out the chocolate without making it taste like coffee.
- Store these in the fridge in an airtight container, and they'll be perfect for a full week.
 Save to Pinterest
 These chocolate caramel bars are the kind of thing you make when you want to feel generous or when you want to prove something sweet to yourself on an ordinary day. They're really quite simple once you've made them once.
Recipe FAQs
- → What type of chocolate works best for these bars?
-
Semi-sweet or dark chocolate provides a rich flavor and melds well with the caramel, but milk chocolate can be used for a sweeter variant.
- → How do I achieve a smooth caramel layer?
-
Constantly stir granulated sugar over medium heat until it’s golden-brown, then carefully add butter and cream, simmering until the mixture thickens slightly.
- → Can I add crunch to these bars?
-
Yes, sprinkle chopped toasted nuts or cookie pieces between the caramel and chocolate layers for added texture.
- → How should these bars be stored?
-
Store in an airtight container in the refrigerator to maintain firmness and freshness for up to one week.
- → Why is chilling important during preparation?
-
Chilling helps each layer set firmly, ensuring clean slices and a balanced texture between the chocolate and caramel.
